Add Your Heading Text Here
In the last few years I have started doing quite a few more road trips during my travels. And now thanks to Covid-19, with international travel much more difficult, if not impossible for most people – there has been a rise in people choosing to explore more of their own country by car. So with people likely doing more road trips for a while, I wanted to share the tips and tricks I have picked up for planning a stress free road trip.
Some of these things may be obvious. But if you like being organized like I do, and especially if you have a limited amount of time to explore and want to make the most of that time, then hopefully this will be helpful.
The whole planning and research stage can take a while. But I find that once all that is out the way, when you actually start your trip, you don’t really have to think or worry about anything as most things are already planned out.
Part 1: Planning What to See with 'My Maps' in Google
When planning the perfect road trip, deciding on what you actually want to see and do will usually take up the largest amount of time.
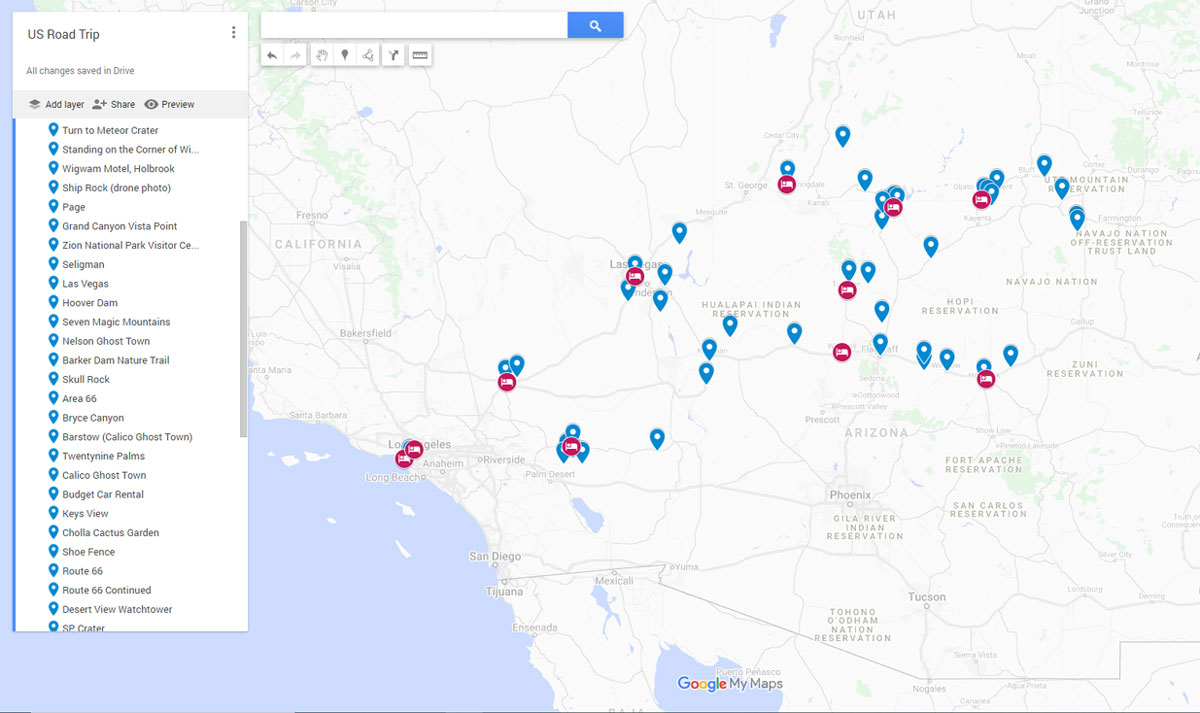
Once I’ve decided on the country or general area I want to explore – I start out by going to Google ‘My Maps‘, and creating a new map so I can mark out all the locations that I want to see.
While you can just mark and save places on Google Maps, I use this as it will sync from my computer to my phone, it can easily be hidden (so your Google Maps isn’t all cluttered with icons), it can also easily be shared with others, and you can also give them the option to add to it. You can just follow the link to ‘My Maps’ and click ‘Create New’. But details of how to do this directly through Google Maps can be seen below.
- Step 1
- Step 2
- Step 3
- Step 4
- Step 5
- Step 6
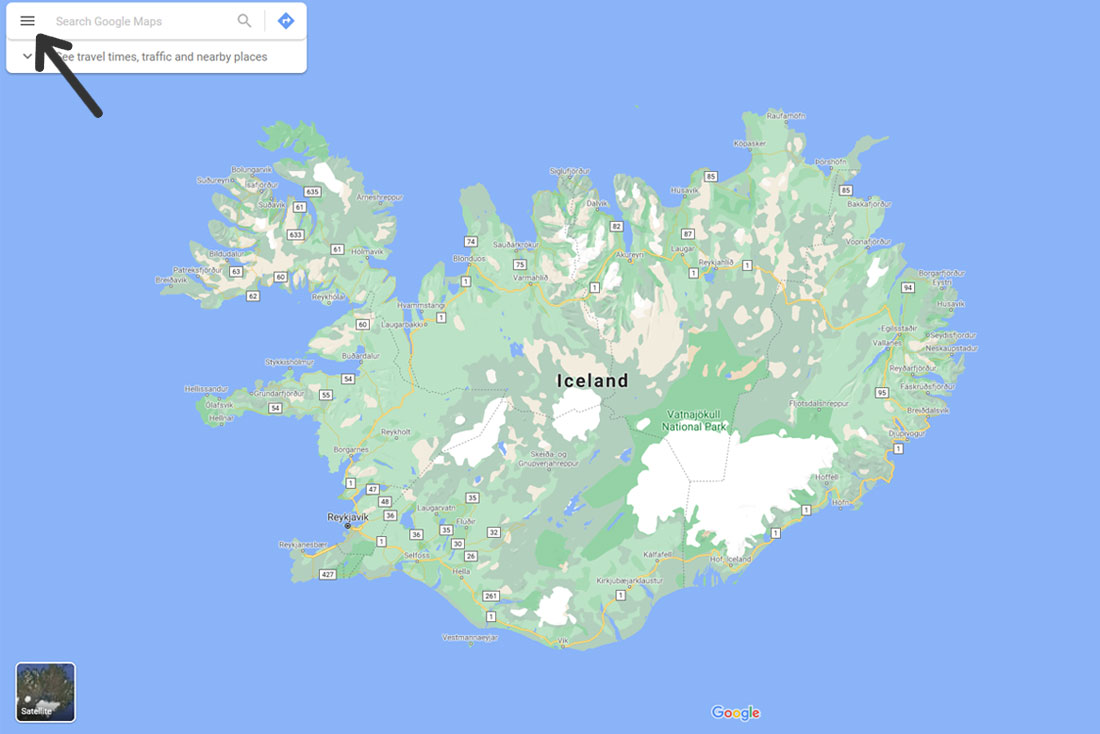
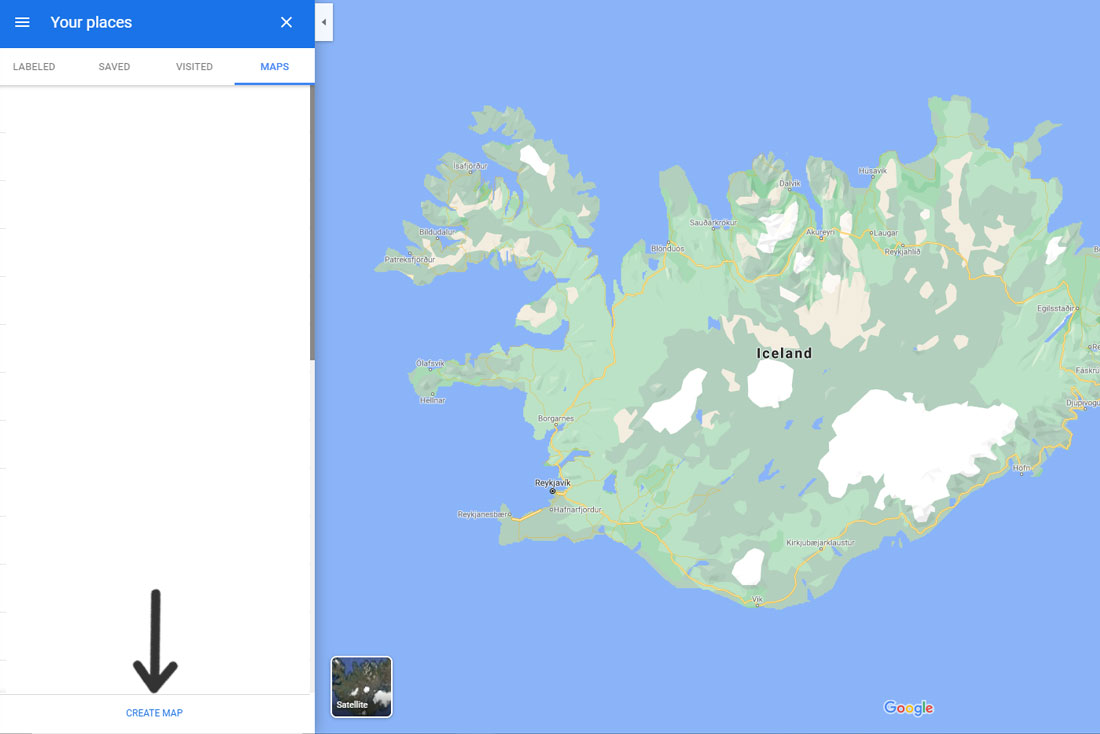
Open Up Google Maps and Click the 3 stacked lines in the top left corner
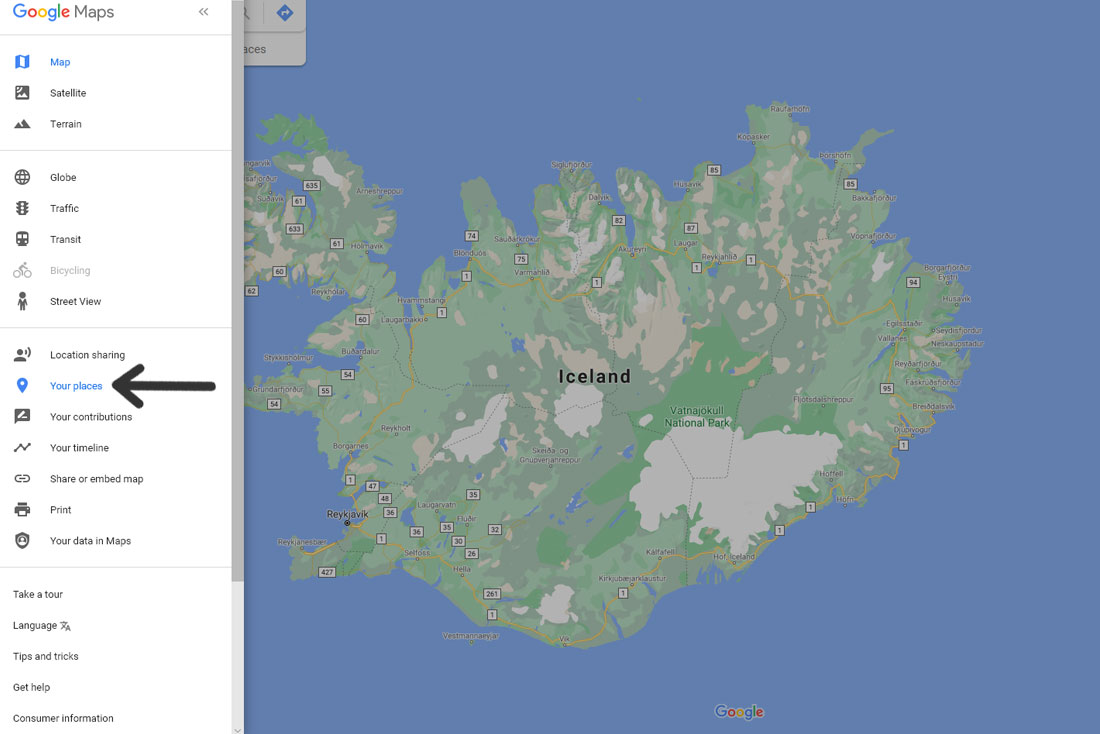
On the menu, click on ‘Your Places’
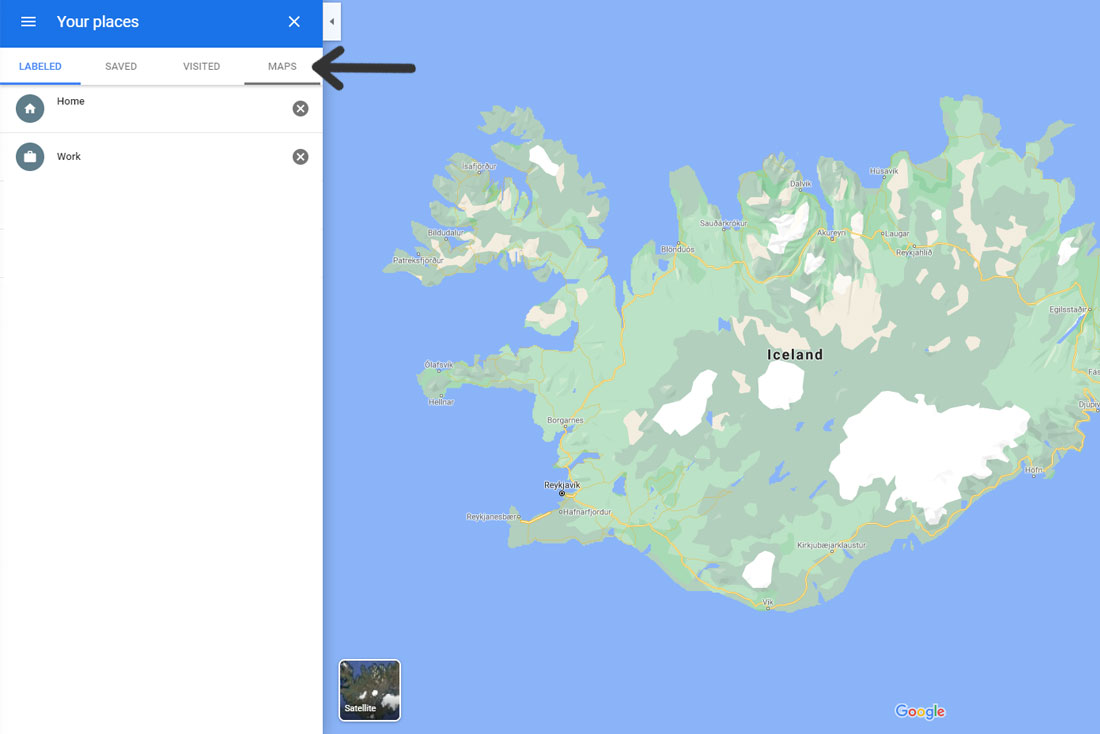
Click on the ‘Maps’ Tab
Click on ‘Create Map’ at the bottom of the page
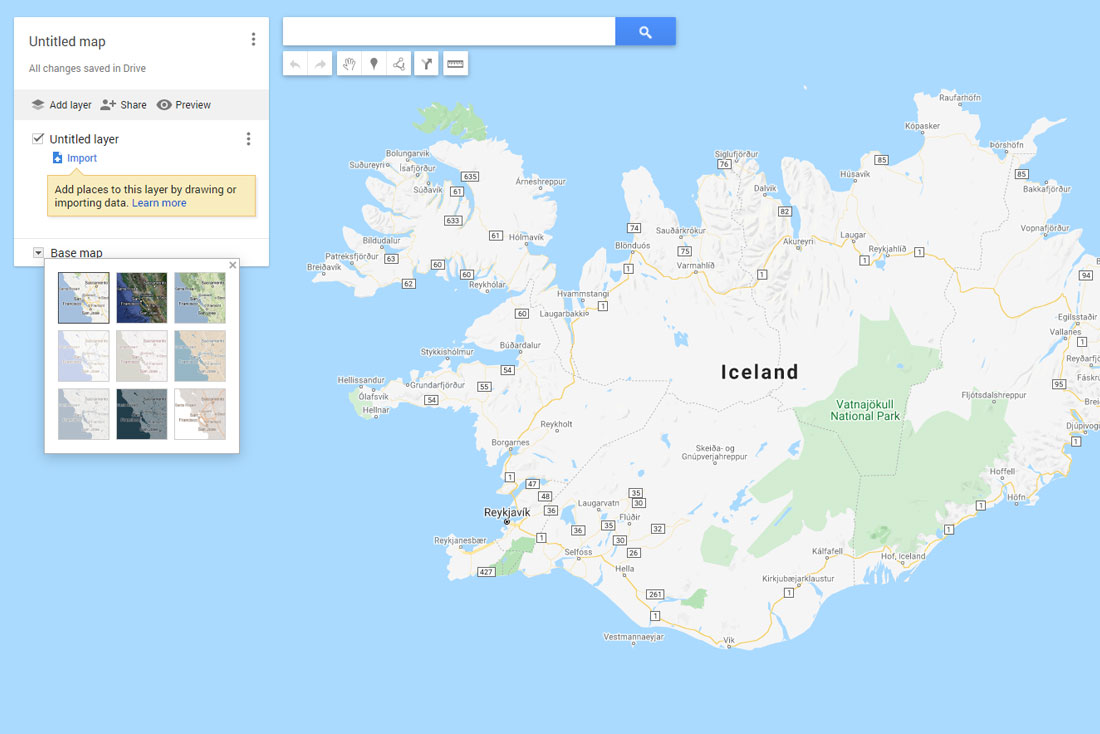 In the new page that opens, you can add a title to your map, choose your base map style, create new layers (for separating categories), and can start adding places to your map
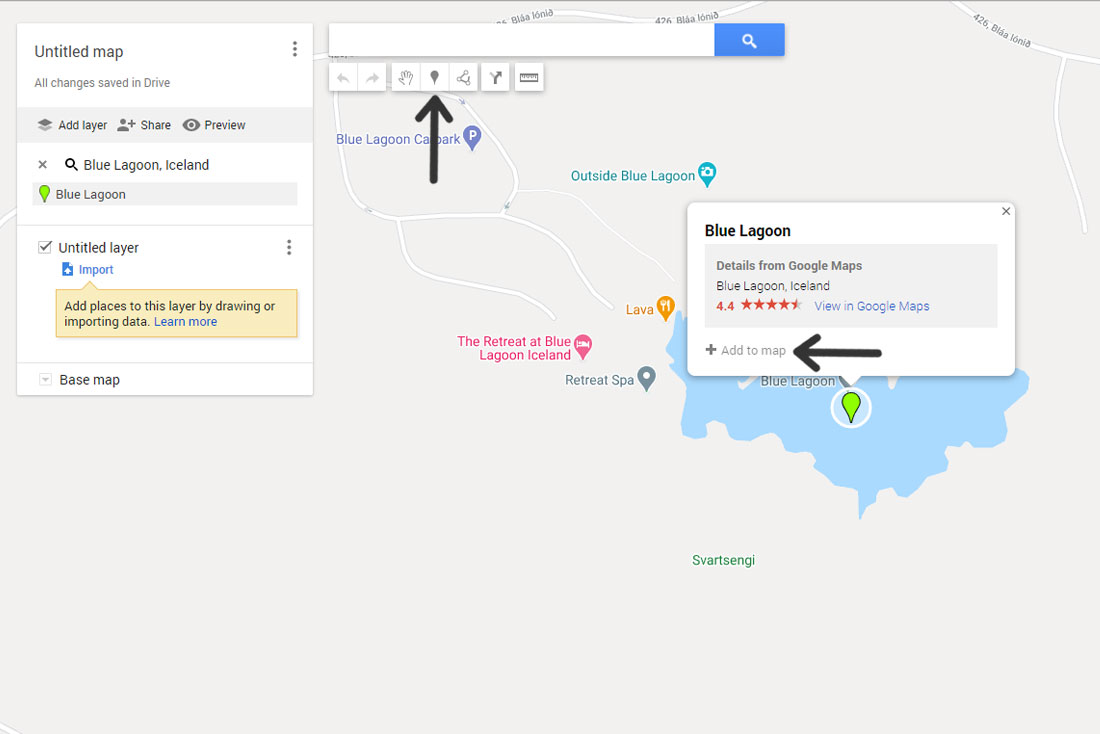 You can add markers either by clicking the ‘Add Marker’ icon under the search bar and clicking on the map. Or you can search for the location (or click on any existing location marker), and click ‘+ Add to Map’ at the bottom of the location pop up.
Once I have a new map created, I will then spend time going through blogs, Instagram, Pinterest, Youtube videos, ‘Must See’ lists and anything else I can find – marking the exact locations of each place I want to see. I will also usually check out Atlas Obscura, which is a great site for finding some of the more unusual attractions.
You can usually also find other Google Maps that have been created by people that are set to ‘Public’, and either save the whole thing to your own list of maps, or just go through what they have saved and add the places that interest you to your own map.
For my Iceland road trip I was able to find maps of the best campsites to stay at. As well as a map of all the ‘Bonus Supermarkets’ around the country (which is one of the cheaper supermarket chains). And in an expensive country like Iceland where you want to try and keep to a budget, and where these supermarkets are very spread out and you might not see one for a few days, this came in very handy.
Part 2: Planning Your Route
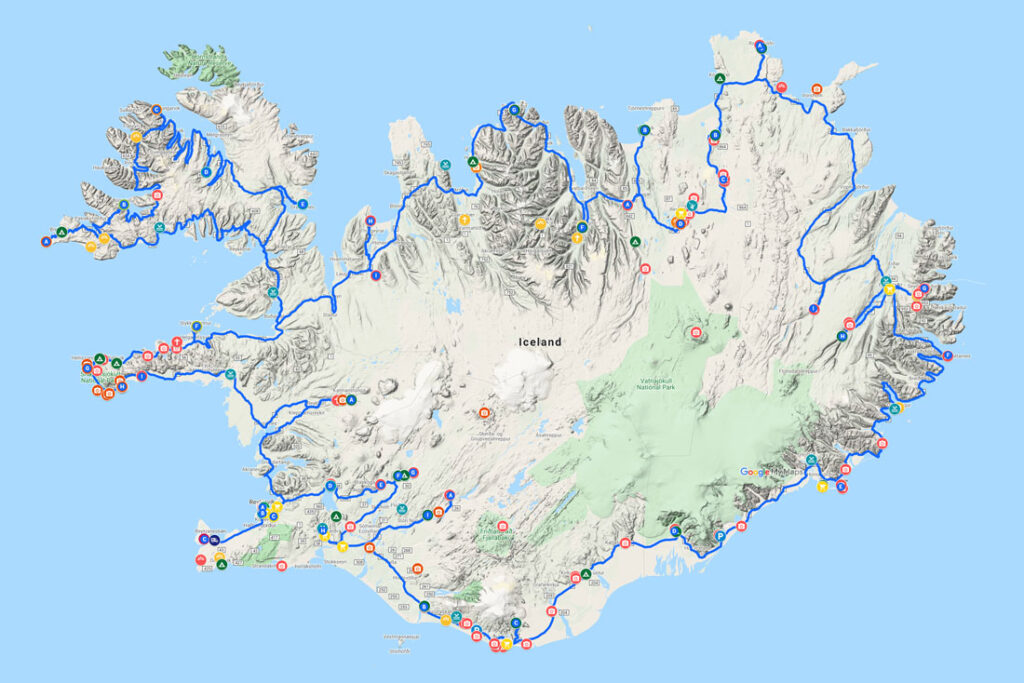
Once you’ve spent time researching all the places you want to visit on your map, clusters will start to form and a general route will start to appear. Then it’s basically a game of connect the dots – and at this stage I usually work out all the information I need for my route in a few different ways.
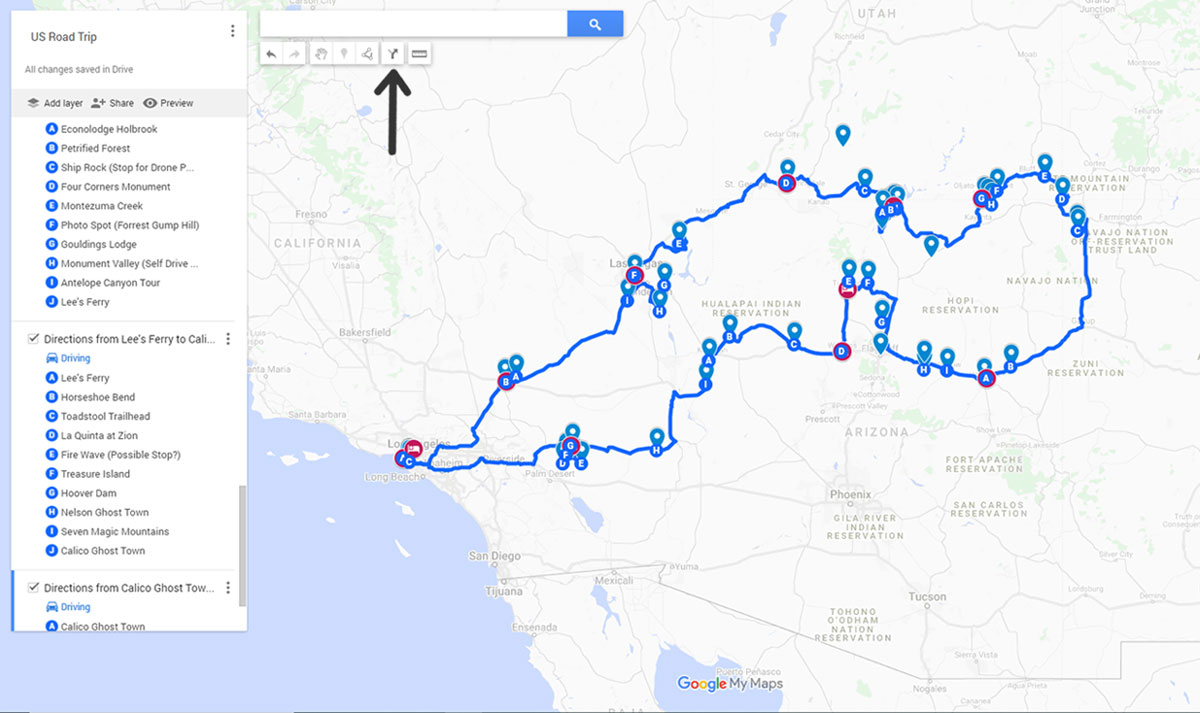
Step One: Create your route using the ‘Add Directions’ button in the Google Map you have set up. Annoyingly it seems to limit the number of points you can have for directions (from point ‘A’ to point ‘J’) – so with lots of points you may need to make multiple direction layers. But eventually you’ll see what the whole driving route could look like.
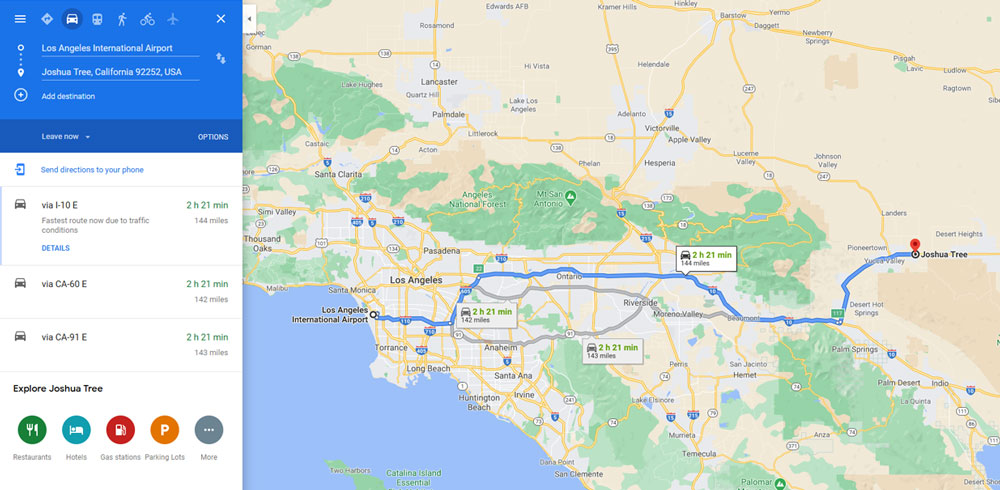
Step Two: Since you don’t really get information like the driving time or distance in ‘My Maps’, I usually like to go into the regular Google Maps and make a note of how long it takes to drive from point to point.
This then allows me to see how long I can realistically drive in a day, while also figuring out how long I will need to visit the places I want to see (Tip: Always allow a little extra time for both, as things will almost always take longer than you expect).
From here you can then start splitting the route into days. This will then let you figure out how long you actually need to do the trip (and adjust it if needed), and you can start looking at where to stay each night and if needed, to start looking into car rental costs.
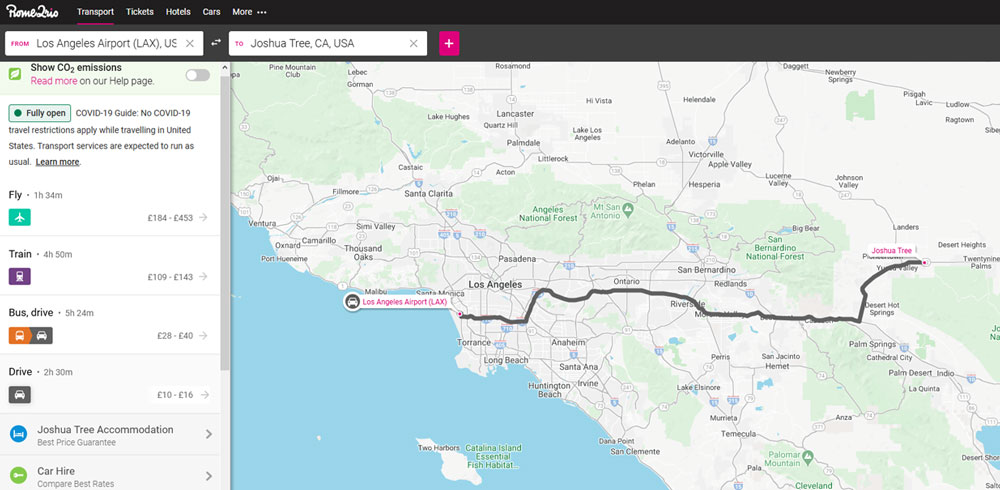
Step 3: While Google Maps likely gives the most accurate information on driving time and route options, I also like to just double check on Rome2Rio. This is an extremely handy site for planning how to get from point to point, and to get a general idea of the travel time and cost, which helps you work out an estimated budget for the trip.
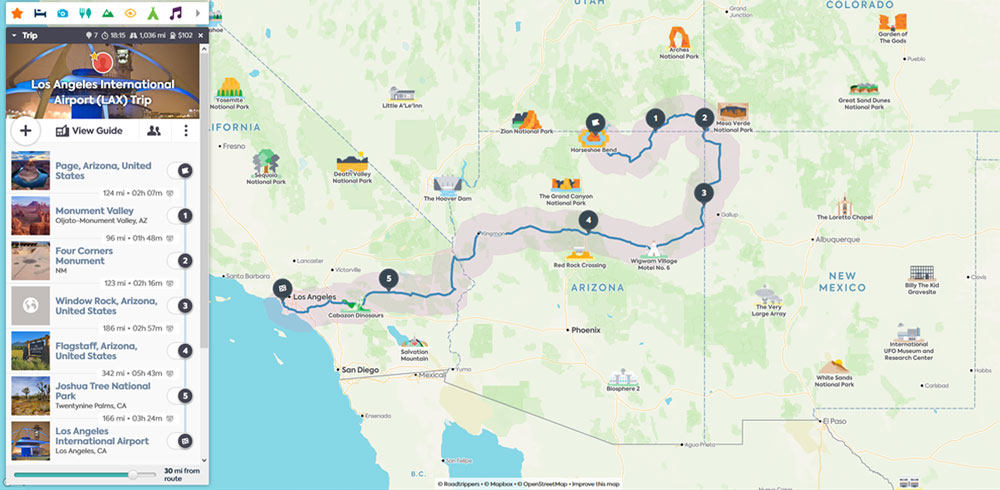
Step 4: The final site I like to check is Roadtrippers. Unless you pay for a yearly subscription, you can only mark 7 points on a map (but you are able to make and save multiple maps, so it’s not really a problem). But since it’s not something I use often enough for a subscription, I generally mark the destinations I’ll be stopping at for the night.
What I like about Roadtrippers is on top of the driving time and distance, it also gives you approximate fuel costs. So by comparing that with what Rome2Rio says, you can get a decent idea of what the fuel costs should be for the trip.
You can also see different attractions by filtering a certain distance from your route. And on your saved stops, you can also see the top things to do and best places to stay in that area.
Part 3: Car Rentals
Now that you have your route planned out, and have an idea of how long it should take to do the trip, you can look into renting a car. If you’re travelling locally and already have your own vehicle, then you obviously don’t have to worry about this. But these are a few tips I’ve picked up from my trips.
Shop Around & Compare Prices from Different Office Locations: The type of car you get is obviously up to you, but it’s always worth shopping around and comparing different prices/locations.
On a two week road trip I did in Canada, I ended up renting a car that was a 30 minute train ride from downtown Vancouver, for a few hundred dollars. If I got that exact same car from the same rental company but from their airport office, it was going to be $1000 more than what I paid. Purely because the location was more popular and convenient for most people. So even if you use a certain company regularly for your bookings – check if they have multiple rental locations around your starting point.
Scams & Insurance: Always go with reputable car rental companies where you can. Ideally ones that are well known globally – or if you’re unsure, make sure to do your research and check reviews. While most companies would likely be fine to rent from, there are often reports of some smaller or dodgy looking ones saying you’ve scratched the car and then try and charge ridiculous fees.
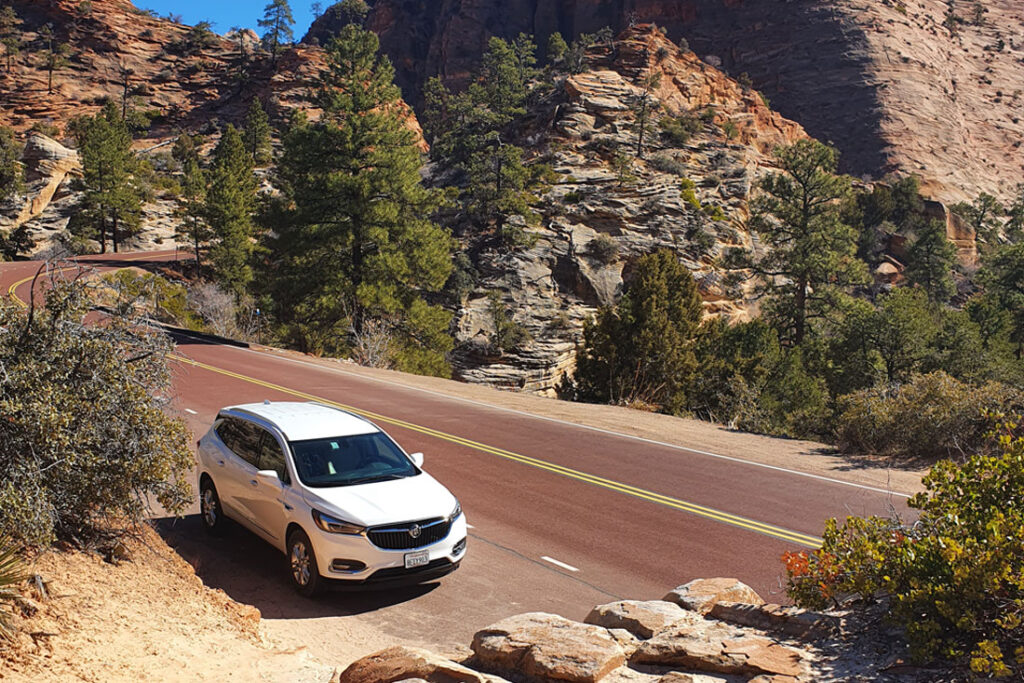
Take photos/video of the vehicle and any marks when you pick it up (and also if returning it off out of hours). Just to make sure you have evidence in case they try and charge you for something you didn’t do.
And also check what you’re covered for in case of an accident/breakdown to make sure there are no unexpected costs. Although I’ve never had to use it – I get Car Hire Excess Insurance from Worldwide Insure for about £60 a year. Which saves a lot from upgrading the insurance cover with the car rental company.
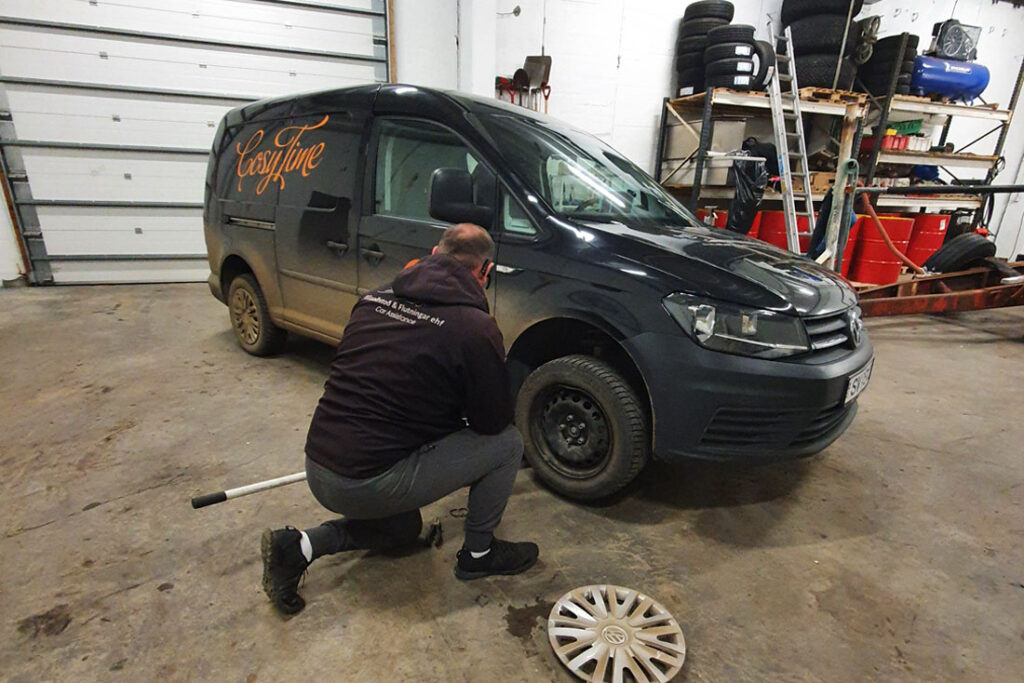
Unfortunately they don’t cover Iceland, and I decided not to upgrade to the higher insurance coverage on my trip there, and ended up paying £300 for a new tyre (after a bad puncture), and almost £900 to repair wind damage to the door. That increased the cost of my trip by about 50%! I won’t be making that mistake again.
Part 4: Accommodation
If you’re able to be living the Van Life and travel with a bit more freedom without being stuck to a time limit, then this might not apply as much. On my trip around Iceland in a Camper Van I googled campsites near me each evening, which worked out fine most of the time.
But depending on the place or the time of year, and especially if you are on a strict time limit, I’d highly recommend looking at booking your accommodation in advance in case places get fully booked. For example in Banff I’d read places get booked out quickly, so booked went to book accommodation a few months in advance. I was lucky to find a dorm room that was affordable for a few nights, otherwise the rooms jumped up to over £300 a night anywhere nearby. And even some of the campsites were fully booked.
I personally likely to book through Booking.com and then filter by free cancellation (and make sure there is parking). Just to give me some flexibility if plans change or I find somewhere better.
Apps I Use

